Creamy Chicken Afghani: The Easiest Restaurant-Style Delight at Home

Authentic Afghani chicken

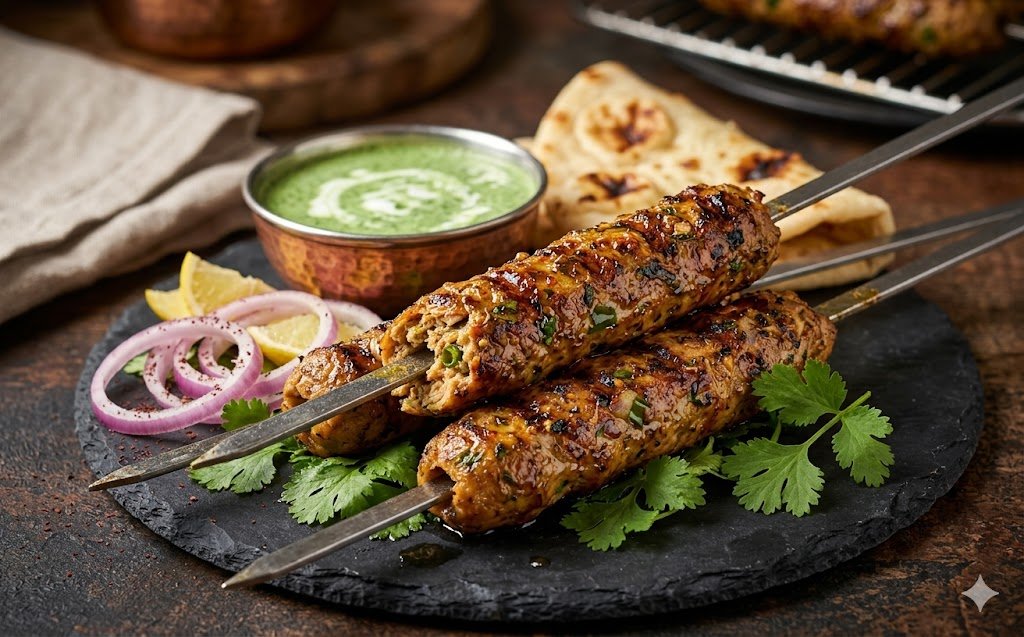
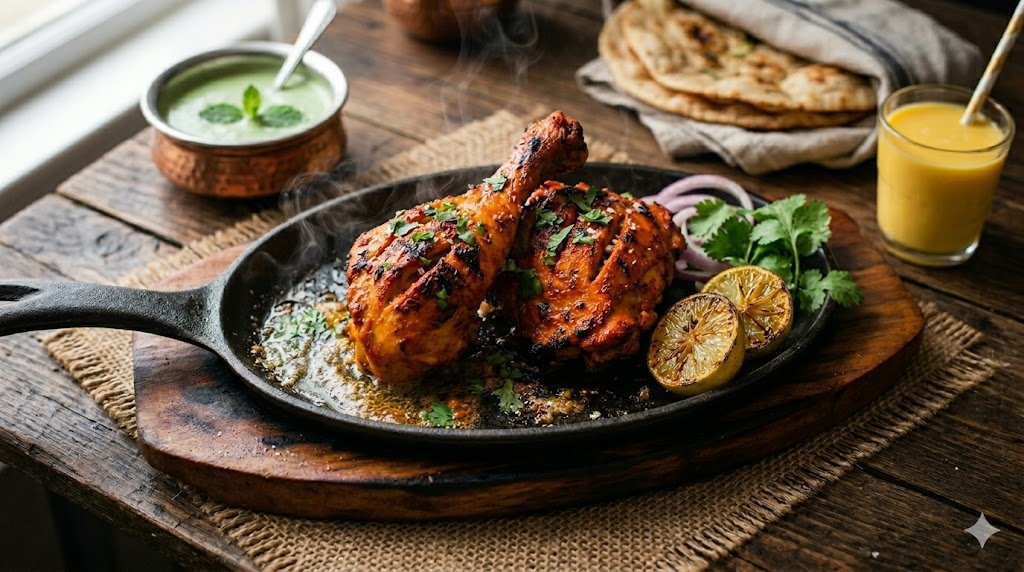
If you’re a regular at RecipeBuzz!, you know we chase those bold, velvety flavors that make Indian-inspired cuisine so unforgettable. If you’ve ever sat down at a restaurant and been mesmerized by a platter of succulent, charred, and impossibly creamy chicken, you’ve likely met the legendary Chicken Afghani. While it often looks like a complicated dish reserved for professional chefs, I’m here to tell you that it is actually one of the easiest, most rewarding recipes you can master in your own kitchen.

Why You Should Try It

Chicken Afghani is the ultimate “low-effort, high-reward” dish, making it the perfect starting point for any beginner cook who wants to impress family or guests. Unlike complex gravies that require hours of slow-cooking, this recipe relies on a simple, luscious marinade of yogurt, cream, ginger-garlic paste, and a blend of aromatic spices like kasuri methi and garam masala. It’s a dish that proves you don’t need an industrial kitchen or years of experience to achieve that perfect, melt-in-your-mouth tenderness. By making it at home, you skip the heavy oils often found in takeout and ensure your chicken is fresh, juicy, and perfectly spiced to your liking.

A Glimpse into History

While the name points to Afghanistan, this version of the dish has become a quintessential part of the North Indian and Mughlai culinary landscape. Historically, these flavors trace back to the Silk Road, where techniques of slow-charring meat and using rich, creamy infusions were perfected over generations. Over time, these traditions traveled through the frontiers, evolving into the milder, fragrant, and decadent “Afghani” style we love today—a beautiful testament to how food bridges cultures and generations.

Ingredients You Will Need

Click on the ingredients to add them to your Amazon cart!

The Method

  1. Marinate: In a bowl, whisk together the curd, cream, cashew paste, ginger-garlic paste, salt, pepper, garam masala, and kasuri methi. Coat the chicken pieces thoroughly and let them sit for at least 30 minutes (or up to 2 hours for maximum flavor).
  2. Sear: Heat a pan with a little butter or oil over medium-high heat. Place the chicken pieces in the pan, making sure not to overcrowd them.
  3. Cook: Sear the chicken until it gets those beautiful golden-brown char marks on both sides, then cover and cook on low heat until the meat is tender and fully cooked through.
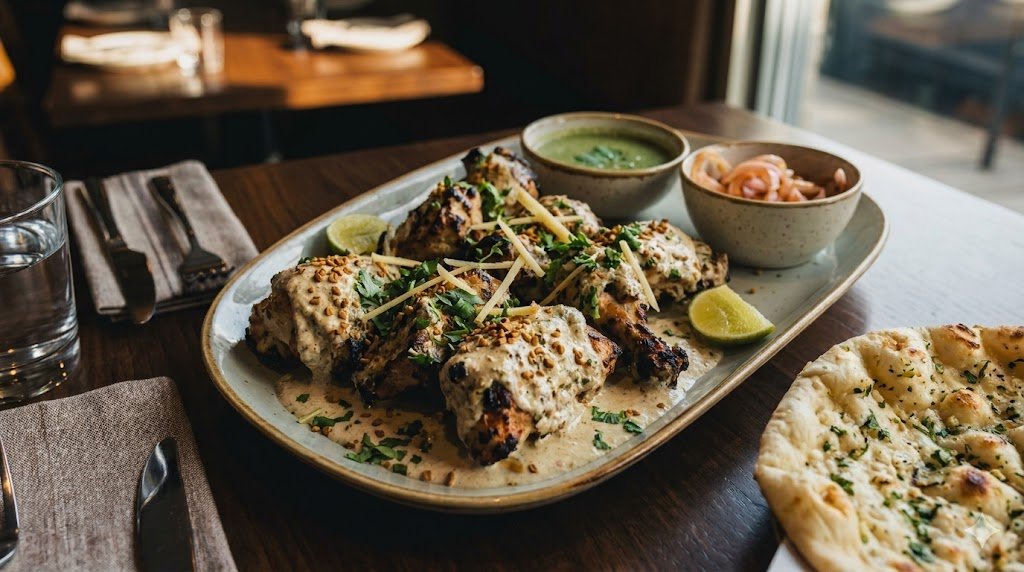
  4. Finish: If you have any leftover marinade, pour it over the chicken in the last few minutes to create a rich, coating sauce. Serve hot with naan or roomali roti!

RecipeBuzz! – Where real flavors meet real kitchens. Try this at home, take a pic, and tag us on Instagram @RecipeBuzzIN!

Mumbai Street-Style Mutton/Chicken Kheema Pav: India’s Ultimate Comfort Food

kheema pav

If you’re a regular at RecipeBuzz!, you know we chase those bold, street-side flavors that make Indian food unforgettable. Mutton or chicken kheema pav reigns as India’s top street food pick—spicy minced meat gravy piled into buttery pav buns, straight from Mumbai’s Irani cafes and Chowpatty stalls. This authentic recipe delivers that vendor magic in your home kitchen, ready in under 45 minutes.

Why Kheema Pav Tops the Charts

Kheema pav blends Parsi roots with Maharashtrian spice, featuring juicy mince, peas, and fresh herbs for a gravy that soaks perfectly into soft pav. Choose mutton for richer depth or chicken for quicker cooks—both pack protein and pair with chai for breakfast, snacks, or dinners. At RecipeBuzz!, we’ve tailored it for busy home chefs craving that spicy, slurpy bite.

If you’re a regular at RecipeBuzz!, you know we chase those bold, street-side flavors that make Indian food unforgettable. Mutton or chicken kheema pav reigns as India’s top street food pick—spicy minced meat gravy piled into buttery pav buns, straight from Mumbai’s Irani cafes and Chowpatty stalls. This authentic recipe delivers that vendor magic in your home kitchen, ready in under 45 minutes.

Why Kheema Pav Tops the Charts

Kheema Pav 

Kheema pav blends Parsi roots with Maharashtrian spice, featuring juicy mince, peas, and fresh herbs for a gravy that soaks perfectly into soft pav. Choose mutton for richer depth or chicken for quicker cooks—both pack protein and pair with chai for breakfast, snacks, or dinners. At RecipeBuzz!, we’ve tailored it for busy home chefs craving that spicy, slurpy bite.

Garnish with raw onions, lemon squeeze, and chilies to mimic the beach shack vibe—your plate will vanish faster than at a Mumbai tapri.

Ingredients (Serves 4-5)

For the Kheema:

Click on the ingredients to add them to your Amazon cart!

For the Pav:

  • 8-10 pav buns
  • 2 tbsp butter
  • Pinch of red chili powder and salt

Prep Tip: Marinate mince with salt, turmeric, and ginger-garlic for 20-30 mins—locks in flavor as pros do.

Step-by-Step Instructions

Keema Pav 

  1. Bhuno the Base: Heat oil/ghee in a wide kadhai over medium high. Add whole spices and cumin; let them crackle (20 secs). Toss in onions; sauté till deep golden (8-10 mins).
  2. Build Masala: Add ginger-garlic paste and chilies; fry for 1 min till the raw smell fades. Stir in tomato puree, ground spices, and salt; cook till oil separates and masala thickens (7-10 mins). Splash water if sticking.
  3. Cook the Mince: Crumble in mince and peas; mix thoroughly to coat. Add ½ cup water, cover, and simmer. Mutton: 20-25 mins; chicken: 10-15 mins. Stir occasionally till gravy clings to meat (not watery).
  4. Finish with Herbs: Uncover, stir in all herbs, garam masala, and a butter knob for shine. Simmer for 2 mins uncovered. Taste—adjust spice or tang with lemon juice.
  5. Butter the Pav: Slit pavs halfway. Heat butter in a tava, sprinkle chili powder, and toast pavs cut-side down till crisp and golden (1-2 mins per side).

Total Time: 40-45 mins. Calories per serving: ~450 (mutton version).

Scoop hot kheema into pavs, top with onion-lemon-chili relish—pure street bliss!

RecipeBuzz! Pro Tips & Variations

  • Texture Secret: Freshly minced meat > store-bought; double dill for that signature green hue without color.
  • Make it Chicken-Only: Swap mutton, cut simmer by half—perfect for weeknights.
  • Storage Hack: Fridge extras up to 3 days; reheat with a splash of water. Freeze gravy for quick pav stuffers.
  • Boost It: Top with a fried egg or cheese for a fusion twist. Vegan? Use soya or plant mince.
  • SEO Keywords: Mumbai kheema pav recipe, mutton keema pav street style, chicken kheema pav easy, authentic Indian kheema pav home cooking.

Serve family-style with sirke wala pyaz (vinegar onions) and Irani chai—your table becomes a Mumbai stall.

RecipeBuzz! – Where real flavors meet real kitchens. Whip this up, snap a pic, and tag us on Instagram @RecipeBuzzIN. What’s your twist on kheema pav? Drop in comments

Authentic Mumbai-Style Prawns Koliwada: The Crispy Coastal Delight

Prawns koliwada dish

If you are looking to bring the iconic flavors of Mumbai’s Koliwada region into your home kitchen, look no further than these crispy, spice-marinated prawns. Famous for their fiery red hue and irresistible crunch, Prawns Koliwada is a classic street-food snack that pairs perfectly with a tangy green chutney and a squeeze of fresh lime.

The RecipeBuzz! Secret

At RecipeBuzz!, we believe that the secret to an authentic Koliwada experience lies in the double-marination technique and the balance between gram flour (besan) and rice flour. This combination ensures that the prawns stay succulent inside while developing a satisfying, crispy exterior that holds onto all those bold coastal spices.

Ingredients You Need

Click on the ingredients to add them to your Amazon cart!

Step-by-Step Preparation

Prawns Koliwada 

  1. Marination: In a large bowl, mix the prawns with salt, ginger-garlic paste, Kashmiri chilli powder, ajwain, and lemon juice. Let this sit for 20–30 minutes to allow the flavors to penetrate the meat.
  2. Batter Prep: In a separate bowl, whisk together the besan, rice flour, and a pinch of salt. Gradually add water until you get a thick batter that coats the back of a spoon without running off.
  3. Coating: Gently mix the marinated prawns into the batter, ensuring each one is evenly coated.
  4. Frying: Heat oil in a deep pan over medium-high heat. Carefully drop the prawns in small batches to avoid overcrowding. Fry for 3–5 minutes until they turn a beautiful golden-red and feel crispy to the touch.
  5. Serving: Drain on paper towels and serve immediately, garnished with fresh curry leaves and a generous sprinkle of chaat masala.

Pro Tips for RecipeBuzz! Chefs

For the best results, always pat the prawns dry before the first marination to ensure the spices stick well. If you have fresh curry leaves, tossing them into the hot oil during the final minute of frying adds an incredible aromatic finish that takes this dish to the next level. Enjoy these as a quick, crowd-pleasing appetizer that brings the heart of Mumbai directly to your dinner table!

RecipeBuzz! – Where real flavors meet real kitchens.

Rich & Creamy Palak Paneer – Step‑By‑Step Recipe From RecipeBuzz!

green spinach gravy simmering with aromatic spices

If there’s one North Indian dish that belongs on every homely dinner table, it’s Palak Paneer. This creamy spinach curry, dotted with soft cubes of paneer, is comforting, mildly spiced, and yet packed with flavor. At RecipeBuzz!, we take the classic palak paneer a little further—showing you how to balance color, creaminess, and freshness so every bite feels like a restaurant‑style bowl served straight from your kitchen.

Whether you’re pairing it with hot rotinaan, or plain steamed rice, this palak paneer will stay green, smooth, and well‑balanced, not too heavy and not too bland. Let’s get cooking.


What Is Palak Paneer?

Palak paneer is a North Indian vegetarian curry made from spinach (palak) and paneer (Indian cottage cheese) simmered in a mildly spiced gravy. The base is usually onion–tomato with ginger, garlic, and a blend of spices, then finished with fresh cream or milk for richness.

It’s popular in Punjabi and dhaba‑style cooking and is often treated as a protein‑rich comfort dish for both everyday meals and family gatherings.


Ingredients (Serves 3–4)

For the spinach base:

Click on the ingredients to add them to your Amazon cart!

  • 1 small green chilli (optional, adjust to taste)
  • 500 g fresh spinach (palak), mature leaves preferred
  • 1-inch ginger, peeled
  • 2–3 garlic cloves

For the gravy base:

Paneer & finishing touch:

  • 250–300 g paneer, cubed
  • 2–3 tbsp fresh cream or milk (for creaminess)
  • Fresh coriander leaves, finely chopped (for garnish)
  • 1–2 strips of ginger (optional, for restaurant‑style garnish)

Step‑By‑Step Method (Photos‑In‑Mind Style)

1. Pre‑treat the spinach (prevents bitterness)

  • Wash spinach thoroughly to remove grit. Trim or discard thick, hard stems.
  • Bring a large pot of salted water to boil. Add spinach and blanch for 1–2 minutes until bright green and wilted.
  • Immediately drain and plunge into ice‑cold water to stop cooking and lock in color.
  • Squeeze out excess water gently but firmly; then blend with ginger, garlic, and green chilli into a smooth green puree. This green base will be the soul of your palak paneer.

2. Build the masala base (aromatic foundation)

  • Heat ghee or oil in a heavy‑bottomed pan or kadhai. Add cumin seeds and let them sizzle for a few seconds.
  • Add chopped onion and sauté over medium heat until soft and translucent (about 5–6 minutes).
  • Add chopped tomatoesturmeric powderred chili powder, and coriander powder. Cook until the tomatoes break down and the oil begins to separate from the masala. This forms the warm, aromatic base of the gravy.

3. Add spinach puree and spices

  • Add the blended spinach‑ginger‑garlic paste along with ½ cup hot water. Stir well.
  • Season with salt and adjust spices. Let the mixture simmer for 5–7 minutes on medium heat, stirring occasionally, so the raw spinach taste disappears, and the gravy thickens slightly.
  • Sprinkle garam masala and crushed kasuri methi into the gravy. Kasuri methi adds a subtle earthy depth that many restaurant‑style palak paneer recipes rely on.

4. Cook the paneer gently

  • Add paneer cubes and gently fold them into the gravy. Avoid vigorous stirring to keep the paneer soft and intact.
  • Let it cook on low heat for 3–4 minutes so the paneer absorbs the flavor without becoming tough.
  • If the gravy feels too thick, add a splash of hot water to reach your preferred consistency. A medium‑thick gravy works best with roti or rice.

5. Finish with cream and garnish

  • Add fresh cream or milk and stir gently to maintain the creamy texture.
  • Turn off the heat and garnish with chopped coriander leaves and (if you like a restaurant‑style look) thin strips of raw ginger. The ginger adds a subtle bite and visual contrast.

Pro Tips for Perfect Palak Paneer

  • Blanching is key: Skipping blanching or using too much spinach can make the curry bitter or muddy‑colored. Keep the spinach time short and cool it quickly.
  • Balance cream & water: Use cream sparingly for richness, but keep enough water so the gravy isn’t pasty.
  • Paneer texture: If your paneer is firm, soak the cubes in warm salted water for 10–15 minutes before adding them to the gravy; this keeps them soft.
  • Color control: If the gravy starts to darken, lower the heat and avoid overcooking; the color change is usually from excessive heat on the spinach‑tomato mix.

Variations to Try (RecipeBuzz! Ideas)

  • Restaurant‑style extra‑rich: Use butter + heavy cream and add a pinch of cardamom powder for a Punjabi restaurant‑style twist.
  • Healthy, lighter version: Skip cream and use skimmed milk or coconut milk; reduce oil slightly and increase spinach for a very green, slightly thinner gravy.
  • Paneer‑free twist (Palak Gravy): Use this same base to make palak‑loaded rice, palak paratha, or even a palak shorba/soup by thinning it further.
  • Mixed greens saag paneer: Add bathua, sarson, or methi along with spinach for a regional winter saag‑style version.

Substitutions (For Different Kitchens)

  • Paneer substitutes: Use ricotta, tofu, or paneer‑style firm cheese; adjust cooking time so soft cheeses don’t break apart.
  • Dairy‑free: Replace cream with coconut milk or cashew paste for a non‑dairy, still‑creamy version.
  • Spinach: In a pinch, you can use frozen spinach—just thaw, squeeze dry, and grind as usual.

Serving Ideas For RecipeBuzz!

Serve your palak paneer:

  • With hot tandoori roti, naan, or lachha paratha for a Punjabi‑style meal.
  • Alongside steamed jeera rice or plain white rice for a quick weeknight dinner.
  • With a side of onion‑cucumber salad and a small bowl of curd/yogurt to balance the warmth of the spices.

Sizzling Chicken Seekh Kebab Recipe at RecipeBuzz! – Juicy Skewers in 30 Minutes!

Chicken Seekh Kabab

At RecipeBuzz!, we’re all about bringing street-style Indian flavors to your kitchen with easy, crowd-pleasing recipes like these smoky Chicken Seekh Kebabs. Minced chicken packed with ginger-garlic, fresh herbs, and warm spices grills up tender and charred—perfect for iftar, barbecues, or weeknight appetizers serving 4.

Key Ingredients for RecipeBuzz! Perfection (Serves 4)

Click on the ingredients to order them from Amazon.

Step-by-Step at RecipeBuzz!

  1. Mix chicken with onion, herbs, ginger-garlic, spices, besan, lemon, and salt. Knead lightly 4-5 mins (no overmixing to keep tender).
  2. Chill 30-60 mins for flavor lock-in.
  3. Skewer into 4-5-inch cylinders on soaked skewers; press smooth.
  4. Grill/tawa on medium-high for 3-4 mins/side, basting with ghee. Or oven at 200°C/400°F for 12-15 mins.
  5. Smoke with ghee-charcoal for 1-2 mins if desired.

Pro Tips from RecipeBuzz!

  • Squeeze the onion dry to prevent crumbling.
  • Test one kebab first; add egg if too loose.
  • Medium heat avoids dryness.

Serve with mint chutney and naan—~250 cal/serving. RecipeBuzz! readers love pairing it with biryani!

These kebabs are RecipeBuzz! Gold—tag us in your pics! Craving more? Check out our Paneer Tikka or Chicken Biryani posts.

Crispy Chicken Harabhara – Green Herb Kebabs That Steal the Show

Chicken Harabhara

If you love aromatic, herb‑packed kebabs with a deep green, crispy crust, Chicken Harabhara is a must-try dish for your kitchen. Originating from North Indian kebab traditions, this dish features minced chicken patties coated in a thick green chutney paste (harabhara mix), then shallow‑fried until golden and crunchy.

At RecipeBuzz!, we love turning classic kebabs into easy‑to‑make home recipes, and this Chicken Harabhara is perfect for weekend dinners, party platters, or as a bold side to tandoori chicken, biryani, or a simple paratha‑rilawali meal.


What makes Chicken Harabhara special?

  • Bold green crust: The patties are smothered in a herb‑rich chutney of coriander, mint, and green chilies, giving a fresh, aromatic crunch.
  • Tender, juicy interior: Inside, the chicken patty stays soft and moist, balancing the crisp outer layer beautifully.
  • Party‑ready snack: Easy to scale up, these harabharas work great as a starter platter, a side with biryani, or a quick snack with tea.

Ingredients (Makes 14–16 patties)

For the chicken harabhara mixture

Click on the ingredients to order them beforehand.

For the green harabhara coating

For frying and serving


Step‑by‑step method

1. Prepare the chicken patties

  • In a large bowl, combine minced chicken with:
    • Finely chopped onion
    • Ginger‑garlic paste
    • Chopped green chilies
    • Green peas (if using)
  • Add:
    • Garam masala
    • Coriander powder
    • Cumin powder
    • Red chili powder
    • Salt
    • Chaat masala (if using)
    • Cornflour or breadcrumbs
  • Mix well with your hands until the mixture holds together without being too wet.
  • Divide into 14–16 small balls and flatten each into a round patty (about ½ inch thick).
  • Cover and refrigerate for 20–30 minutes so the patties firm up and hold shape while frying.

2. Make the harabhara (green) coating

  • In a blender or food processor, combine:
    • Coriander leaves
    • Mint leaves
    • Green chilies
    • Onion
    • Cumin seeds
    • Coriander seeds (if using)
  • Blend into a thick paste, adding a little curd or yogurt and 1–2 tbsp oil for smoothness.
  • Add a pinch of salt and blend again briefly.
  • Adjust consistency: it should be thick enough to coat the patties but not runny.
  • Transfer this green paste into a shallow bowl.

3. Coat and fry the harabharas

  • Take one chilled chicken patty, dip it in the green harabhara paste, and coat it evenly on both sides. Repeat for all patties.
  • Heat oil in a heavy pan for shallow frying (or deep frying if you prefer).
  • Gently place the coated patties into the hot oil.
  • Fry on medium‑low flame, turning once, until both sides are golden brown and crisp (about 3–4 minutes per side).
  • Remove with a slotted spoon and drain on kitchen paper to remove excess oil.

Serving ideas

  • Serve hot with lemon wedgesmint chutney, or tamarind‑date chutney for dipping.
  • Pair Chicken Harabhara with tandoori chickenroyal biryani, or falooda for a full Indian-style meal series you can feature on RecipeBuzz!.
  • For an appetizer platter, serve with mirchi ka salanraitaonion rings, and kachumber salad.
  • Great for weekend dinners, Rakhi or Eid occasions, or as a starter feature in an “Indian Kebab Special” post on your blog.

Tips for the best results

  • Keep the chicken mixture lightly moist but not wet; if it feels loose, add a little more cornflour or breadcrumbs.
  • Don’t skip the chilling step—it helps the patties stay intact while frying.
  • For a healthier version, pan‑sear or shallow‑fry with minimal oil instead of deep‑frying.
  • Adjust green chilies to your heat level: fewer for milder flavor, more for a fiery kick.

With this Chicken Harabhara RecipeRecipeBuzz! brings you a restaurant‑style, herb‑packed kebab that’s easy to reproduce at home and perfect for readers who love bold North Indian flavors.

Authentic Hyderabadi Biryani Recipe – How to Make Restaurant‑Style Dum Biryani at Home

Hyderabadi Dum Biryani

Authentic Hyderabadi Biryani Recipe – How to Make Restaurant‑Style Dum Biryani at Home

Few dishes capture the grandeur of Indian cuisine like Hyderabadi Biryani. Fragrant basmati rice, tender chicken, and the subtle warmth of saffron, ghee, and whole spices come together in a slow‑steam “dum” cooking method that turns a simple rice dish into a royal feast.

This recipe focuses on a classic chicken-based Hyderabadi biryani that stays close to the traditional style you’d find in Hyderabad’s best dhabas and family kitchens.


What makes Hyderabadi biryani special?

Hyderabadi biryani is more than just seasoned rice and meat. It’s defined by its layered, dum‑style preparation, where the flavors meld slowly in trapped steam.

  • Dum cooking: The meat and rice are layered and sealed so the biryani cooks slowly in its own juices, locking in aroma and tenderness.
  • Fragrant layers: Saffron‑infused milk, fried onions, and marinated chicken are stacked in layers, so every spoonful has a mix of textures and aromas.
  • Balanced spice: Whole spices, ginger‑garlic, green chilies, and biryani masala create depth rather than aggressive heat.

Ingredients (Serves 4–6)

For the biryani rice

(Click on the ingredients below to order them on Amazon.)

For the biryani masala (chicken)

For the saffron layer


Step‑by‑step method

1. Marinate the chicken

  • In a large bowl, mix chicken with:
    • 1 tbsp ginger‑garlic paste
    • 1–2 tsp chili powder
    • ½ tsp turmeric
    • 1 tbsp biryani masala
    • Salt
    • 1 tbsp oil
  • Add 1 cup curd/yogurt and rub well into the chicken pieces.
  • Cover and refrigerate for at least 2 hours (4–6 hours or overnight for best flavor).

2. Cook the biryani masala

  • Heat 1–2 tbsp ghee or oil in a heavy‑bottomed pan.
  • Add 1–2 slit green chilies and sauté for 30 seconds.
  • Add 1 roughly chopped onion (if you want extra body) and cook till golden.
  • Add any leftover ginger‑garlic paste and cook for 2 minutes.
  • Add the marinated chicken with its marinade.
  • Cook on medium‑high heat, stirring occasionally, until the chicken turns opaque and the masala thickens (about 10–12 minutes).
  • Stir in:
    • 1 tsp coriander powder
    • ½ tsp chili powder (if needed)
    • Salt to taste
  • Reduce the heat and cook for 5–7 minutes more until the chicken is almost done but not dry.
  • Turn off the heat and mix in chopped mint and coriander leaves, plus 2–3 tbsp fried onions. Keep aside.

3. Cook the basmati rice

  • Drain the soaked basmati rice and rinse once.
  • In a large pot, bring 3–4 cups of water to a boil with whole spices and 1 tsp salt.
  • Add the rice and cook until 70–80% done (grains are soft but still slightly firm in the center).
  • Drain immediately and spread the rice on a tray to cool slightly; this prevents mush.

4. Prepare the saffron milk

  • Soak a pinch of saffron strands in 2–3 tbsp warm milk with a pinch of sugar. Keep aside. The infusion will give the biryani a rich golden hue and subtle perfume.

5. Layer the biryani (dum-style).

Use a heavy pot with a tight‑fitting lid (like a pressure pot without the weight or a deep handi).

  1. Bottom layer:
    • Lightly grease the pot with ghee.
    • Spread a thin layer of fried onions (birista).
  2. First meat layer:
    • Spread the cooked chicken masala evenly.
  3. First rice layer:
    • Spread half the cooked rice over the masala.
  4. Middle layer:
    • Sprinkle mint and coriander leaves.
    • Add a few more fried onions.
  5. Second meat layer (optional):
    • Add the remaining chicken masala if the pieces are large.
  6. Top rice layer:
    • Finish with the remaining rice.
  7. Saffron and ghee:
    • Drizzle the saffron milk over the top.
    • Add 1–2 tbsp ghee for extra aroma.
    • Garnish with reserved fried onions and a few mint leaves.

6. Cook on “dum” (steam cooking)

  • Cover the pot with a tight lid.
  • Place the pot on a tawa (or a flat plate) and cook on a low flame for 20–25 minutes.
  • For a more authentic seal, place kitchen foil around the lid or use a dough ring (atta) around the rim to trap steam.
  • After cooking, turn off the heat and let the biryani rest for 5–10 minutes so the flavors meld before serving.

Serving ideas

  • Serve hot with raita (cucumber, boondi, or onion), mirchi ka salan, or dahi kebab.
  • Pair it with tandoori chicken, grilled kebabs, or a simple salad for a complete meal.
  • For dessert, finish the meal with faloodadouble‑ka‑meetha, or khubani ka meetha.
  • Great for weekend dinners, family gatherings, or festive meals like Eid.

Tips for the most authentic taste

  • Always use bone‑in chicken or mutton for a richer flavor.
  • Don’t overcook the rice before layering; it should finish cooking in the dum.
  • Seal the lid properly to trap steam and aroma—this is the heart of Hyderabadi biryani.
  • Use good-quality saffron and ghee; they transform the perfume and richness of the dish.

How to Make Chicken Tandoori at Home (Easy Restaurant‑Style Recipe)

Chicken Tandoori

Welcome to RecipeBuzz!—your go-to kitchen companion for simple, flavorful dishes that look as good as they taste. Today, we’re bringing you a classic that never disappoints: chicken tandoori. With its juicy, smoky chicken and vibrant red‑orange marinade, it’s one of the most photogenic Indian dishes you can make at home—no tandoor oven needed.

In this recipe, I’ll show you how to marinate the chicken perfectly and cook it in an oven, air fryer, or even on a grill so it tastes like restaurant‑style tandoori, with plenty of tips to make it your own.


What Is Chicken Tandoori?

Chicken tandoori is chicken marinated in spiced yogurt and roasted in a tandoor (clay oven). The yogurt keeps the meat tender, while spices like cumin, coriander, garam masala, turmeric, and Kashmiri red chili give it that signature color and aroma.

For RecipeBuzz!, we simplify the process so you can get that same rich, smoky flavor using your regular kitchen tools and ingredients.


Ingredients (for 3–4 servings)

For the marinade:

For serving:

  • 1–2 tbsp oil or butter (for brushing)
  • Lemon wedges
  • Fresh coriander leaves
  • Sliced onions or a sprinkle of chaat masala (optional)

Step‑by‑Step: How to Make Chicken Tandoori (RecipeBuzz! Style)

1. Prepare the chicken

  • Wash the chicken pieces and pat them very dry with a clean cloth. This helps the marinade stick better and gives you a slightly charred, crisp finish.
  • If using bone‑in pieces, make 2–3 small slits on each to let the spices go deep inside. For boneless, cut into 1–1.5-inch cubes.

2. Make the marinade

  • In a large bowl, mix the yogurt, ginger‑garlic paste, lemon juice, and oil until smooth.
  • Add Kashmiri red chili, turmeric, cumin, coriander, garam masala, roasted cumin, and salt. If you like that bright restaurant‑style look, add a pinch of red color here.
  • Stir until the mixture is evenly colored and coats the back of a spoon.

3. Marinate the chicken

  • Add the chicken pieces to the marinade and massage them well so every piece is coated.
  • Cover and refrigerate for at least 2–3 hours, but 4–6 hours or overnight if you can. The longer it marinates, the juicier and more flavorful your Chicken Tandoori will be.

4. Preheat your cooking method

For an oven (RecipeBuzz! favorite):

  • Preheat your oven to 200–220°C (400–425°F).
  • Line a baking tray with foil and place a wire rack on top. Lightly brush the rack with oil so the chicken doesn’t stick.

For an air fryer:

  • Preheat the air fryer to 190–200°C (375–400°F).
  • Arrange the chicken in a single layer; you can cook in batches.

For a grill or tawa:

  • Oil the grill or tawa and heat on medium‑high.

5. Cook the chicken

Oven method:

  • Remove chicken from the marinade and shake off excess. Place pieces on the rack, skin side up if using bone‑in.
  • Brush lightly with oil or butter for shine.
  • Roast for 30–35 minutes, turning once halfway, until the chicken is fully cooked with nicely charred edges and an internal temperature of 75°C (165°F).

Air fryer method:

  • Place marinated chicken in the basket without crowding.
  • Air fry for 18–22 minutes, flipping once, until the chicken is cooked through and has a golden‑brown finish.

Grill / tawa method:

  • Grill or cook for 8–10 minutes per side, turning once, until the chicken is done and has clear grill marks.

6. Final touch

  • Just before serving, brush the chicken with a little melted butter or oil for that glossy finish.
  • Sprinkle a pinch of chaat masala or roasted cumin powder if you like, and garnish with lemon wedges and fresh coriander leaves.

Tips for Perfect Chicken Tandoori

  • Use bone‑in pieces whenever possible; they stay juicier and more flavorful.
  • Don’t skip the long marination; it’s the secret behind tender, restaurant‑style chicken.
  • Want a smoky taste? Add a tiny piece of lit charcoal (safely handled) in a foil packet in the oven, or use a pinch of smoked paprika in the marinade.
  • Adjust the spice level by reducing or increasing the Kashmiri chili and adding a bit of green chili paste if you like more heat.

How to Serve Chicken Tandoori on RecipeBuzz!

  • Serve hot with sliced onions, lemon wedges, and green mint chutney for that classic street food vibe.
  • Pair with naan, roti, or jeera rice for a full Indian meal.
  • For a lighter option, serve with a simple salad of cucumber, tomato, and onion.

Why This Recipe Works for RecipeBuzz!

Chicken Tandoori is colorful, aromatic, and incredibly share‑worthy—perfect for a blog like RecipeBuzz! that celebrates easy, impressive recipes you can actually make at home. With this recipe, your readers can recreate that restaurant‑style red‑orange chicken, snap a few photos, and feel like a pro cook in their own kitchen.

Try this how-to-make-chicken-tandoori recipe and tag RecipeBuzz! When you share your photos with friends or on social media. Happy cooking! 🍗✨

Street-Style Paneer Tikka: Sizzling RecipesBuzz Favorite

Paneer Tikka

Nothing beats the smoky, spicy allure of street-style paneer tikka—those charred, masala-coated cubes straight from Indian roadside stalls that make your taste buds dance. At RecipesBuzz!, we’re all about bringing that chaatwala magic home with this easy recipe serving 4 in just 40 minutes. Perfect as an evening snack, party appetizer, or alongside drinks, it’s protein-packed vegetarian bliss with bold flavors.

Why RecipesBuzz! Loves Paneer Tikka

Originating from Punjab but a pan-India street food star, paneer tikka blends creamy paneer with a fiery yogurt marinade, grilled to perfection. It’s quick, customizable, and healthier than fried snacks—grilling locks in juices while adding that irresistible char.

Ingredients for RecipesBuzz! Perfection

Marinade Magic (makes it restaurant-level):

Skewers Add Crunch:

  • 1 medium onion, petals separated
  • 1 bell pepper (green or red), 1-inch cubes
  • 1 tomato, deseeded wedges

Buzz-Serving Sides:

RecipesBuzz! Step-by-Step Guide

Step 1: Whip Up the Marinade

In a large bowl, whisk yogurt, mustard oil, ginger-garlic paste, all dry spices, chaat masala, kasuri methi, lemon juice, and salt into a smooth, thick paste. Taste test: It should be spicy, tangy, and aromatic—like a street vendor’s secret.

Step 2: Marinate Like a Pro

Gently fold in paneer cubes, onion petals, bell peppers, and tomato wedges. Ensure even coating without breaking the paneer. Cover and refrigerate for 20-30 minutes (or up to 2 hours/overnight for deeper flavor penetration).

Step 3: Skewer and Grill to Glory

Preheat a tawa, grill pan, or heavy skillet on high heat. Thread 4-5 marinated pieces alternately with veggies onto soaked wooden/metal skewers. Brush lightly with oil. Grill 3-4 minutes per side, turning for even char marks and smoky edges. Paneer should firm up with golden-brown blisters.

RecipesBuzz! Pro Tip: For authentic tandoor smoke, use dhungar—place a lit charcoal piece in a foil cup with a tsp ghee inside the covered pan for 1-2 minutes. The aroma is game-changing!

Step 4: Final Buzz Finish

Sprinkle hot tikka with extra chaat masala while sizzling. Serve immediately with lemon wedges, onion rings, and chutneys for dipping and squeezing.

RecipesBuzz! Hacks, Variations & Nutrition

  • Texture Hack: Use firm paneer; lightly press or freeze 15 mins if soft.
  • Oven/Air Fryer Buzz: Broil at 450°F (230°C) for 8-10 mins, flip halfway; air fry 180°C for 10 mins.
  • Vegan Buzz: Sub extra-firm tofu, large mushrooms, or boiled chana.
  • Spice It Up: Add chopped green chilies or black salt for extra heat.
  • Make-Ahead: Marinate ahead; grill fresh for best crunch.
  • Storage: Fridge for up to 2 days in an airtight container; reheat on a hot tawa to revive crispness (microwaving sogs it).
  • Per Serving (2 skewers): ~250 calories, 20g protein, low-carb friendly.

This sizzling street food is addictive—juicy inside, charred outside, with spices that linger. At RecipesBuzz!, it’s our go-to for impressing guests or solo indulgence!

Craving more buzz? Pair with our pav bhaji or paneer tikka masala recipes. Grill up, snap a pic, and tag RecipesBuzz! We’d love to feature your version!

Authentic Pav Bhaji Recipe: Mumbai’s Iconic Street Food at Home

Steaming hot pav bhaji topped with butter, onions, and lemon—street food perfection!

If you’ve ever strolled through Mumbai’s bustling streets, the sizzle of pav bhaji on a griddle and its spicy, buttery aroma would stop you in your tracks. Pav bhaji is more than a dish—it’s a flavor explosion of mashed veggies, bold spices, and fluffy buttered pav (bread rolls). This vegetarian street food staple originated in the 19th century as a quick meal for mill workers, blending everyday veggies into a masala-packed mash served with pav.

Good news: You don’t need a street cart to enjoy it. This authentic pav bhaji recipe serves 4-6 and takes about 45 minutes. It’s beginner-friendly, customizable, and perfect for weeknight dinners or parties. Let’s dive in!

Ingredients You’ll Need

Gather these fresh staples—most are pantry essentials in Indian kitchens.

For the Bhaji (Mashed Veggie Curry):

  • 3 medium potatoes, boiled and mashed
  • 1 cup cauliflower florets, boiled
  • 1/2 cup green peas, boiled
  • 2 carrots, finely chopped and boiled
  • 1 large onion, finely chopped
  • 2 tomatoes, pureed (or 1 cup canned tomato puree)
  • 2 tablespoons ginger-garlic paste
  • 3 tablespoons pav bhaji masala (store-bought or homemade)
  • 2 tablespoons butter + extra for serving
  • 1 teaspoon red chili powder
  • 1/2 teaspoon turmeric powder
  • Salt to taste
  • 1 cup water (adjust for consistency)
  • Juice of 1 lemon

For the Pav (Bread):

Garnishes:

  • Chopped onions, lemon wedges, fresh cilantro, and a dollop of butter

Step-by-Step Instructions

Step 1: Prep the Veggies

Boil potatoes, cauliflower, peas, and carrots until soft (about 15 minutes in a pressure cooker or pot). Mash them roughly with a potato masher—keep some texture for that street-style bite. Set aside.

Step 2: Make the Bhaji Masala Base

Heat 2 tablespoons of butter in a large kadai or wok over medium heat. Add chopped onions and sauté until golden brown (5-7 minutes). Stir in ginger-garlic paste and cook for 1 minute until fragrant.

Add tomato puree, chili powder, turmeric, pav bhaji masala, and salt. Cook until the oil separates and the masala thickens (8-10 minutes)—this is the flavor foundation!

Step 3: Simmer the Bhaji

Add mashed veggies to the masala. Mix well, then pour in 1 cup water. Mash everything together vigorously with a masher or the back of a spoon for that signature bhaji texture. Simmer on low for 10 minutes, stirring occasionally. Finish with lemon juice for tang. Taste and adjust spices—street food is bold!

Step 4: Toast the Pav

Slit pav horizontally without cutting through. Heat butter in a tawa (griddle), sprinkle pav bhaji masala, and toast pav on both sides until crisp and golden (1-2 minutes per side).

Serving Suggestions

Plate a generous scoop of bhaji in a bowl. Top with a pat of butter, chopped onions, cilantro, and a lemon squeeze. Serve with hot, buttered pav on the side. Dip, scoop, and devour!

Pro Tip: For extra smokiness, use a live charcoal piece (dhungar method): Place a small bowl with ghee and coal in the bhaji, cover, and let it infuse for 2 minutes.

Variations and Tips for Perfection

  • Vegan Version: Swap butter for oil or vegan butter.
  • Spicy Kick: Add green chilies or extra chili powder.
  • Healthy Twist: Use whole wheat pav or air-fry veggies.
  • Make-Ahead: Bhaji tastes better the next day—reheat with a splash of water.
  • Common Mistakes to Avoid: Don’t over-mash (retain texture) and always use fresh pav bhaji masala for authentic taste.
  • Storage: Refrigerate bhaji for 3 days or freeze for a month. Pav toasts fresh.

Nutrition (per serving): ~350 calories, high in fiber from veggies, packed with vitamins A and C.

Pav bhaji isn’t just food—it’s nostalgia in every bite. Recreate Mumbai’s streets in your kitchen and watch it become a family favorite!